Documentation 📖
Your guide to using NodeCanvas in Unity
The Editor
1.Toolbar
File
- Clear: Completely clears all nodes.
- Import JSON: Let’s you import a graph exported previously in json format.
- Export JSON: Export the graph in a json file format.
- Show JSON: Shows the serialization json of the graph in a text editor.
Edit
- Bind To Owner: Binds the current graph to the GraphOwner.
- Save To Asset: Saves the current graph to an .asset file.
- Promote Missing Parameters to Variables: Fills the blackboard with variables for all missing parameters found in the current graph if any.
Prefs
- Show Comments: Will toggle node and graph comments on and off.
- Show Summary Info: Will show the full summary info of what a task assigned on a node will do, otherwise only the name of the assigned task will be shown.
- Show Node IDs: Will show the ID of each node next to that node for debugging purposes.
- Show Running Times: Will show how long each node is running for debugging purposes.
- Show Grid: Will toggle the grid display on and off.
- Grid Snap: Toggles grid snapping for the nodes.
- Log Events Info: Will log event-related functionality to the console.
- Log Variables Info: Will log variable-related functionality to the console.
- Breakpoints Pause Editor: If true, any breakpoint reached will also pause the Unity editor.
- Animate Inspector Panel: Will toggle the animation of the inspector panel on and off.
- Show Hierarchy Icons: Will toggle the display of icons in the Unity hierarchy on and off.
- Collapse Generics In Browser: If disabled, all generic types will be listed in the browser along with any possible arguments. Otherwise only the generic type itself will be listed, in which case you will be able to set the generic type used after the node or task is added through the context menu of the node or task. This can be useful if you want less stuff in your browser.
- Connection Style: Options for how connections look like.
- Automatic Hierarchy Move: If true, when moving a node, all of its children will move as well. (This is also possible with the SHIFT key pressed down when moving a node)
- Open Preferred Types Editor…: Will open up the Preferred Types Editor window.
From the toolbar, you can also open up the Graph Console, the Graph Explorer, as well as the Graph Refactor windows with the relevant buttons each.
2.Node Inspector Panel
The selected node’s options/settings and parameters will show up into this popup panel if a node is selected. This panel is not shown if no node is selected. At the top, the node help text will show as well as common options for the node’s name, tag, and comments. Clicking on the header of the panel will minimize/maximize it. Furthermore, clicking on the small icon on the top left of the panel, will open the panel on an external separate window.
If a node has a task assigned, the task inspector is also shown here.
3.Blackboard Variables Panel
The variables of the GameObject Blackboard as well as the Graph local Blackboard will show here. Clicking Add Variable will open up the relevant context menu for adding a new variable. Clicking on the header of the panel will minimize/maximize it.
4.Canvas
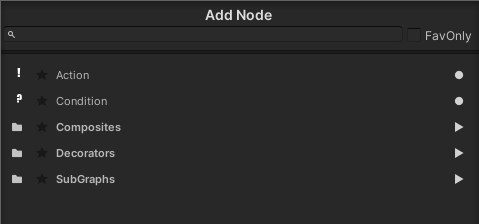
This is where everything takes shape. Right-clicking in the canvas will show a popup for adding new nodes. Either Behaviour Tree nodes, FSM nodes, or Dialogue Tree nodes depending on what you are working with now.

All nodes have a title name or icon and show some information as of what they will do. One node is always marked as “START”. This is the first node to execute when the graph is started. You can change the start node by right-clicking on a node and selecting “Set Start”.
© Paradox Notion 2014-2025. All rights reserved.


