
Documentation 📖
Your guide to using NodeCanvas in Unity

BT Nodes Reference
Leafs
Leaf nodes have no children at all and they live by the end of a branch.
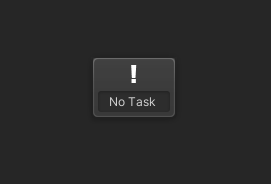
Action
The Action Node will execute an Action Task assigned. The Action node will return Running until the Action Task is finished at which point it will return Success or Failure based on the Action Task assigned.
Remember that wherever an Action Task can be assigned, multiple ones can as well. NodeCanvas will automatically create an Action List if you assign more than one Action Task. This is true everywhere.
- Success: When assigned Action Task finish in Success
- Failure: When assigned Action Task finish in Failure
- Running: While assigned Action Task has not finished.
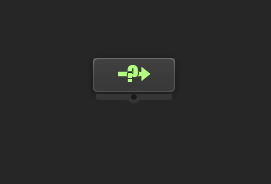
Condition

The Condition Node will execute a Condition Task and return Success or Failure based on that Condition Task.
Remember that wherever a condition task can be assigned, multiple ones can as well. NodeCanvas will automatically create a Condition List if you assign more than one Condition Task. This is true everywhere.
- Success: If assigned Condition Task is true
- Failure: If assigned Condition Task is false
- Running: Never
Composites
Composites work with multiple child nodes and execute them in some order based on the composite functionality.
Sequencer

The Sequencer executes its child nodes in order from highest to lowest priority (left to right). It will return Failure as soon as any child returns Failure. It will return Success if all children return Success.
A Dynamic Sequencer will revaluate higher priority children Status changes. So if a higher priority child returns Failure, the Sequencer will Interrupt the currently Running child and return Failure as well. This is extremely useful to create dynamic and immediate responses to higher priority status changes, most commonly to conditions.
A Random Sequencer will shuffle its children on each reset and then execute them in the new order.
- Success: When all children finish in Success.
- Failure: When any child returns Failure.
- Running: When the current executing child is Running.
Selector
The Selector executes its child nodes in order from highest to lowest priority (left to right). It will return Success as soon as any child returns Success. It will return Failure if all children return Failure.
A Dynamic Selector will reevaluate higher priority children Status changes. So if a higher priority child status returns Success, the Selector will interrupt the currently Running child and return Success as well. Like the sequencer, this is extremely useful to respond immediately to status changes of higher priority children, most commonly to conditions.
A Random Sequencer will shuffle its children on each reset and then start executing them in the new order.
- Success: When any child returns Success.
- Failure: When all children finish in Failure.
- Running: When the current executing child is Running.
Probability Selector

The Probability Selector will select and execute a child node based on its chance to be selected. If that selected child returns Success, the Probability Selector will also return Success. If it returns Failure though, a new child will be picked (similar to a normal Selector). The Probability Selector will return Failure if all children returned Failure, or may immediately return Failure if a ‘Failure Chance’ is introduced.
The connections will read the final chances for each child calculated based on all probability values and the direct failure chance.
- Success: When the selected child node returns Success.
- Failure: When all children return Failure, or the immediate “Failure Chance” took place.
- Running: When the selected child returns Running.
Priority Selector

Used for Utility AI, the Priority Selector executes the child with the highest utility weight. If the selected child fails, the Priority Selector will move to the next highest utility weight child until one succeeds (similar to a normal Selector).
Each child branch represents a “desire”, where each desire has one or more “considerations”.
Considerations are a pair of an input float value and a curve which together produce the consideration utility weight by evaluating the curve with the input value. A curve is optional and if left null, the consideration utility weight will simply be that of the input float value. If multiple considerations are used within a desire, all their weights can either be averaged to produce the final desire utility weight for the child branch, or use the minimum or maximum consideration weight within the desire.
A Dynamic Priority Selector will interrupt its currently running child if another child’s utility weight is or becomes higher. In this case the Priority Selector will return whatever the selected child returns.
The connections will read the final desire utility weight for each child.
- Success: When the first child returns Success.
- Failure: When all children return Failure.
- Running: When the selected child is Running.
Parallel

The Parallel will execute all its children simultaneously. It can be set to have the policy of a Sequencer or a Selector like so:
First Failure. As soon as any child returns Failure, the parallel will reset all current Running children and return Failure as well. Otherwise it will return Success when all children have returned Success.
First Success. As soon as any child returns Success, the parallel will reset all current Running children and return Success as well. Otherwise it will return Failure when all children have returned Failure.
The Parallel also has a third policy called First Success Or Failure, which as the name suggests, will return Success or Failure as soon as the first child returns Success or Failure.
The Parallel can be set to “Repeat” finished child nodes until the policy requirements are met, or until all children have had a chance to finish at least once.
- Success: If set to ‘First Success’, when any child returns Success. If set to ‘First Failure’, when all children finish in Success.
- Failure: If set to ‘First Failure’, when any child returns Failure. If set to ‘First Success’, when all children finish in Failure.
- Running: When any child is Running.
Switch
The Switch composite can switch either an Enum or an Integer value. Depending on what the current Enum or integer value is, it will execute the respective child node and return its status. If another child node is already Running, it will not be interrupted unless the Dynamic option is enabled. The connections will read the integer or enum value for each child.
This node is very useful for creating state-like behaviours and switching between them.
- Success: When the current child node returns Success.
- Failure: When the current child node returns Failure, or if the enum or integer value is out of range in respect to the number of child nodes connected.
- Running: When the current child node is Running.
Step Sequencer

In comparison to a normal Sequencer which executes all its children until one fails, the Step Sequencer executes its children in order (like a sequencer), BUT after every child execution, it returns the status of the child executed. Then the next time the Step Sequencer executes, the next child in order will execute.

- Success: When the current child node returns Success.
- Failure: When the current child node returns Success.
- Running: When the current child node is Running.
Decorators
Decorators always have one child node. They usually give extra functionality to that child, filter it or modify it in some way. Decorators that somehow filter the access of their child node (most do), have a selectable Status option in their inspector to select what Status to return when they filter the access (between Success, Failure, or Optional).
Conditional

Conditional will execute its child node only if the condition assigned is true and then return whatever the child node returns. It will return Failure if the condition is false and the child node is not already Running, unless the Dynamic option is enabled in which case the condition is re-evaluated per tick and in case it fails, the child will be interrupted.
- Success: When the child node returns Success.
- Failure: When the child node returns Failure or if the condition is false.
- Running: When the child node is Running.
Repeat
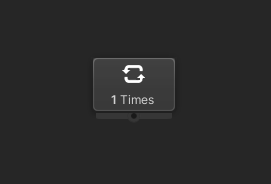
Repeat will repeat its child either a Number of Times, or Until it returns a specific status, or Forever.
- Success: If ‘Repeat Times’, when the child node returns Success on its last repeat. If ‘Repeat Until’, when the child node returns Success and the required status is Success.
- Failure: If ‘Repeat Times’, when the child node returns Failure on its last repeat. If ‘Repeat Until’, when the child node returns Failure and the required status is Failure.
- Running: For as long as it’s repeating.
Cooldown
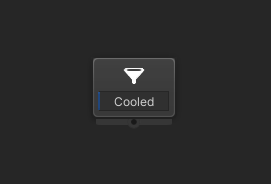
Filters the access of its child node to be possible to run only every specific amount of time.
- Success: When the child node is accessed and returns Success. (or if ‘Limited Status’ is set to Success)
- Failure: When the child node is accessed and returns Failure. (or if ‘Limited Status’ is set to Failure)
- Running: When the child node is accessed and returns Running.
Limit

Filters the access of its child node to be possible to run only for a specific number of times.
- Success: When the child node is accessed and returns Success. (or if ‘Limited Status’ is set to Success)
- Failure: When the child node is accessed and returns Failure. (or if ‘Limited Status’ is set to Failure)
- Running: When the child node is accessed and returns Running.
Iterate

Iterate will iterate a List taken from the Blackboard. On each iteration, the currently iterated element can be stored on a blackboard variable and the child node will execute. The Iterate node can be set to have one of the following policies:
First Success. Will break out of iteration and return Success as soon as the child returns Success.
First Failure. Will break out of iteration and return Failure as soon as the child returns Failure.
None. Will always iterate the whole list. In this case the Iterator will return its child status on the last iteration.
- Success: When the list is iterated and the child node returns Success, or if set to ‘First Success’, as soon as the child node returns Success.
- Failure: When the list is iterated and the child node returns Failure, or if set to ‘First Failure’, as soon as the child node returns Failure.
- Running: For as long as it’s iterating.
Timeout

The Timeout decorator will interrupt the child node if it is Running for more time than the one specified in seconds. Otherwise, it will return whatever the child node returns.
- Success: When the child returns Success.
- Failure: When the child returns Failure, or has timed out.
- Running: When the child returns Running.
Wait Until

Wait Until will return Running until the assigned Condition Task becomes true. If the condition becomes false after the child has been ticked, it will not interrupt it. The condition is checked only when the child is not already Running.
- Success: When the child returns Success.
- Failure: When the child returns Failure.
- Running: When the child returns Running, or if the condition is false.
Monitor

Monitor will monitor the status returned from the child and depending on that status may execute the action task assigned. The final status returned can either be the original decorated child status, or the new action task status.
- Success: When the child returns Success, or the action task returns Success (depending on the options set).
- Failure: When the child returns Failure, or the action task returns Failure (depending on the options set).
- Running: When the child returns Running and when the action task returns Running.
Guard

Protects the decorated child from Running if another Guard with the same specified token is already guarding (Running) that token. The token is a blackboard variable and therefore the scope of the Guard is the same as the scope of the variable used for the token. So depending on the token target blackboard variable the scope of the Guard can be graph, gameobject or even global.
The type of the token is GuardToken which is internaly used only by the Guards. To create such a variable in a blackboard remember that you can simply do “Create New” from the variable selection dropdown of the token parameter.
- Success: When the child returns Success.
- Failure: When the child returns Failure or protection is active and is set to return Failure when protected.
- Running: When the child returns Running or protection is active and is set to return Running when protected.
Override Agent
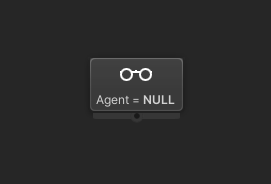
Override Agent will set another Agent for the rest of the Behaviour Tree from this point and on. What this means is that every node underneath this decorator will now be ticked for that new agent and that every task “Self” parameter will use that new agent. You can also revert back to the original agent using another Override Agent later on and selecting the “Revert to Original” option.
- Success: When the child node returns Success.
- Failure: When the child node returns Failure.
- Running: When the child node returns Running.
Succeed

The Succeed Decorator executes the decorated child and force returns Status.Success to the parent regardless.
- Success: When the child node finish.
- Failure: Never.
- Running: When the child node is Running.
Fail

The Fail Decorator executes the decorated child and force returns Status.Failure to the parent regardless.
- Success: Never.
- Failure: When the child node finish.
- Running: When the child node is Running.
Optional

The Optional Decorator executes the decorated child and returns Status.Optional to the parent, thus making the child optional in regards to its Success or Failure. It is as if the node was not there or disabled, even though it executes normally.
- Success: Never.
- Failure: Never.
- Running: When the child node is Running.
Merge

The Merge node is the only node that accepts more than one incoming connections and makes it possible to re-use a branch from multiple parents. Do note that only one parent can call this node at the same time.
- Success: When the child node returns Success.
- Failure: When the child node returns Failure.
- Running: When the child node returns Running.
Sub-Graphs
Sub-Graphs are references to other entire graphs and are used for organization, reusability, and behaviour modularity.
SubTree
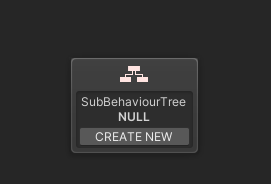
A SubTree is an entire other Behaviour Tree. The SubTree node will return whatever the assigned Behaviour Tree’s root node (“Start”) returns.
The agent and the gameobject Blackboard will be passed down to the SubTree, thus all gameobject blackboard variables on the root BehaviourTreeOwner will be available to the SubTree as well. Remember that you can also use the Variables Mapping feature to map the exposed sub-graph variables to the parent graph variables!
- Success: When SubTree’s root node return Success.
- Failure: When SubTree’s root node return Failure.
- Running: When SubTree’s root node returns Running.
Note: You can create a new SubTree out of a whole branch. To do this, right-click a composite node and select “Convert To SubTree”. This will create a new Behaviour Tree and a new SubTree Node. The selected node, as well as all of its children recursively, will be moved to that new Behaviour Tree. This is useful to organize the behaviours without knowing beforehand how that organization should be.
SubFSM
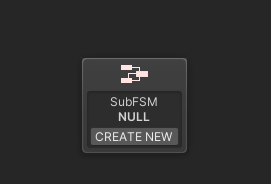
SubFSM can be assigned an entire FSM. When executed, the FSM will Start. The SubFSM node will return Running for as long as the SubFSM is running. You can specify one state of the FSM for Success and another for Failure. As soon as the SubFSM enters any of those states, it will stop and this node will return Success or Failure accordingly. Otherwise, it will return Success when the SubFSM is finished somehow.
The agent and the gameobject Blackboard will be passed to the SubFSM, thus all gameobject blackboard variables of the root BehaviourTreeowner will be available to the SubFSM as well. Remember that you can also use the Variables Mapping feature to map the exposed sub-graph variables to the parent graph variables!
- Success: When the SubFSM enters the selected Success State, or the SubFSM is finished.
- Failure: When the SubFSM enters the selected Failure State.
- Running: For as long as the SubFSM is running.
SubDialogue

SubDialogue can be assigned an entire Dialogue Tree. When executed, the dialogue will Start. The SubDialogue node will return Running for as long as the SubDialogue is running. You can use the “Finish” Dialogue Tree node within the dialogue to return Success or Failure back to the Behaviour Tree. Remember that a Dialogue Tree finishes in Success by default if no nodes are left for it to execute.
The agent and the gameobject Blackboard will be passed to the SubDialogue, thus all gameobject blackboard variables of the root BehaviourTreeowner will be available to the SubDialogue as well. Remember that you can also use the Variables Mapping feature to map the exposed sub-graph variables to the parent graph variables!
- Success: When the SubDialogue returns Success (either because of a Finish node or by default).
- Failure: When the SubDialogue returns Failure (because of a Finish node).
- Running: For as long as the SubDialogue is running.
© Paradox Notion 2014-2026. All rights reserved.